
 This is the longest Doug and I have ever lived in a house. We are going on 12 years in the same house and after giving it some serious thought we decided we probably aren’t going anywhere soon, so we decided it was time to put a little bit of money into our house to update it. It started when we needed a new roof, and then it snowballed into new stucco on the entire house, then somehow it trickled into the inside of the house with new flooring upstairs then new paint and it just hasn’t seemed to stop since then. While I love to decorate and update things, I can’t just run to the store and pick out new cupboards and do things the way I really want them so i have to compromise and work with limited funds. That is one reason it has been a slow process and getting my husband on board is another, he doesn’t really see anything wrong with things the way they are, so trying to convince him that something that seems to be working just fine needs to be changed, isn’t the easiest.
My husband was going away for the weekend, So while he was on his guy’s only getaway trip I decided this was the perfect time to get those kitchen cupboards painted white. I’ve been looking at pretty white kitchens for years and haven’t had the courage to do it myself, but my sister just recently moved close to me and she offered to help me, so I jumped on her offer and we took the entire weekend and knocked this out. It turned out so much better than I thought it would! I did a lot of research on which type of paint to use, I finally decided on Beyond Paint, I chose it because it seemed like it would be the easiest to use and I am all about easy! No stripping, No Sanding, No Priming!


Second: Cleaned with Simply Green All Purpose Cleaner and sand any imperfections, this step isn’t necessary if your cupboards aren’t 100 years old like ours ( OK more like 20+ years)


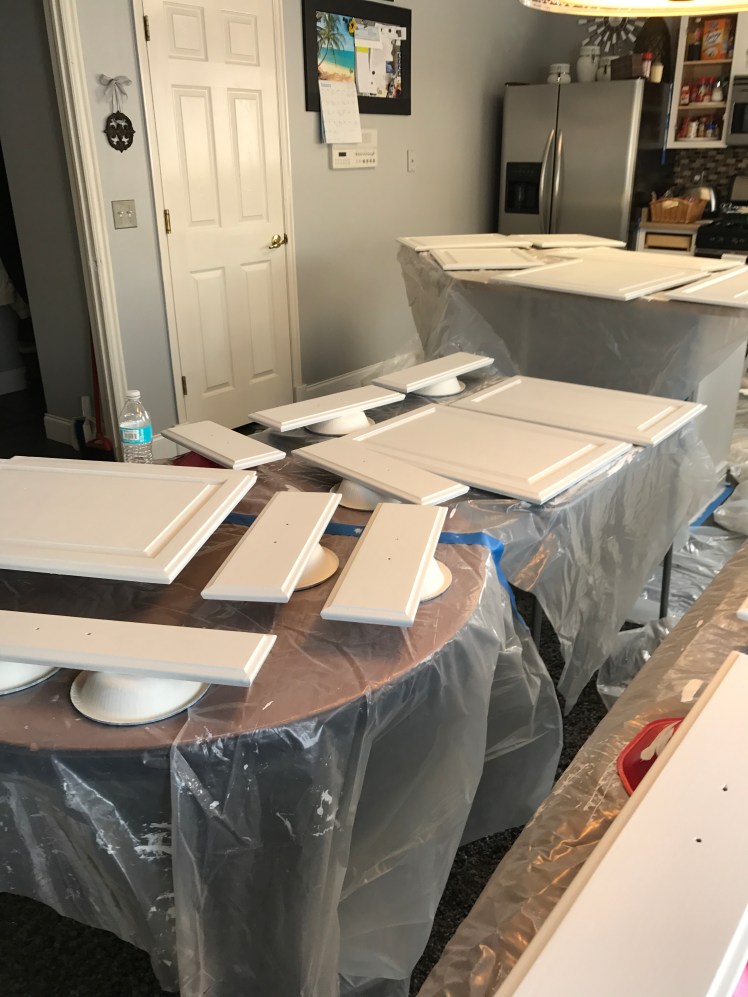
Fourth: Let dry
Fifth: Put everything back together! Sounds super easy right? LOL it was easy, but I’m not gonna lie, it was work, but look how clean and bright my kitchen looks now! And the hubby likes it too…WHEW!!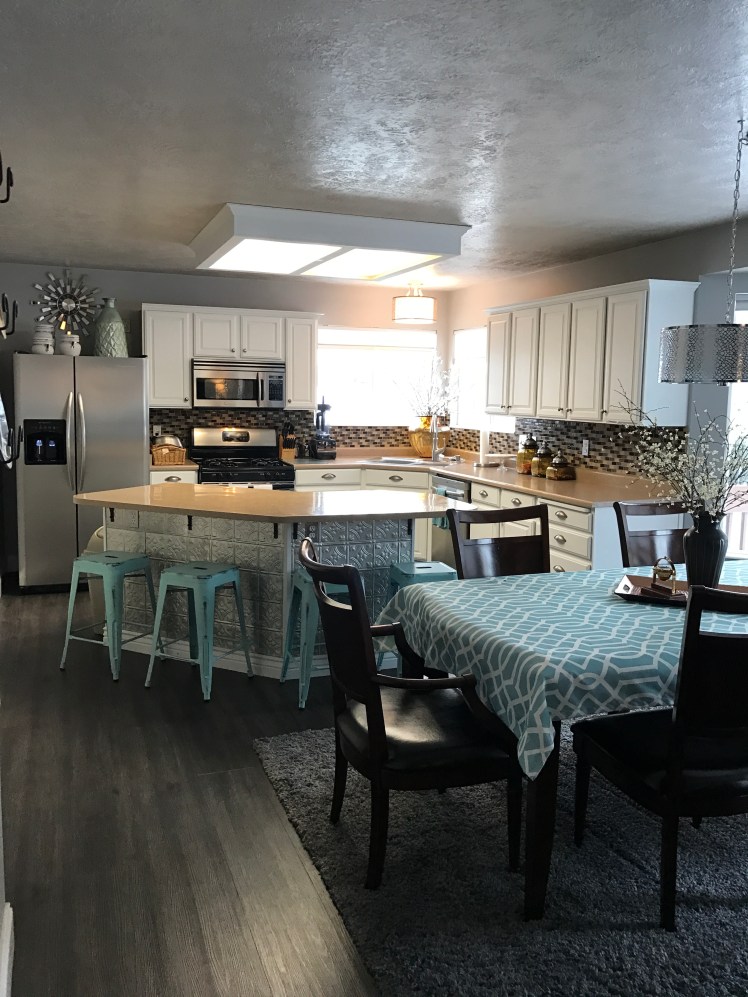


I can’t wait to see all of your improvements this summer!!!
LikeLike
Janna you could be a professional decorator if you wanted too!
LikeLike
Thanks David that would be a fun job!😊
LikeLike